
Table of Contents
🤔 Have You Ever Wondered Why Some Burger Quesadillas Taste Like Magic?
You’ve made your fair share of burgers and quesadillas, but when you combine them into one dish—the Burger Quesadilla—something special happens. It’s crispy on the outside, juicy in the middle, and full of flavor that makes you go back for another bite.
But why does it taste so good? And how can you make yours even better than what you’ve tried before?
Today, we’re unlocking the secrets to making the perfect Burger Quesadilla at home. Spoiler: it’s not just about the meat or cheese—it’s about technique, timing, and a few clever tricks that will change the way you cook forever.
Let’s dive in!
What Makes This Burger Quesadilla Special?
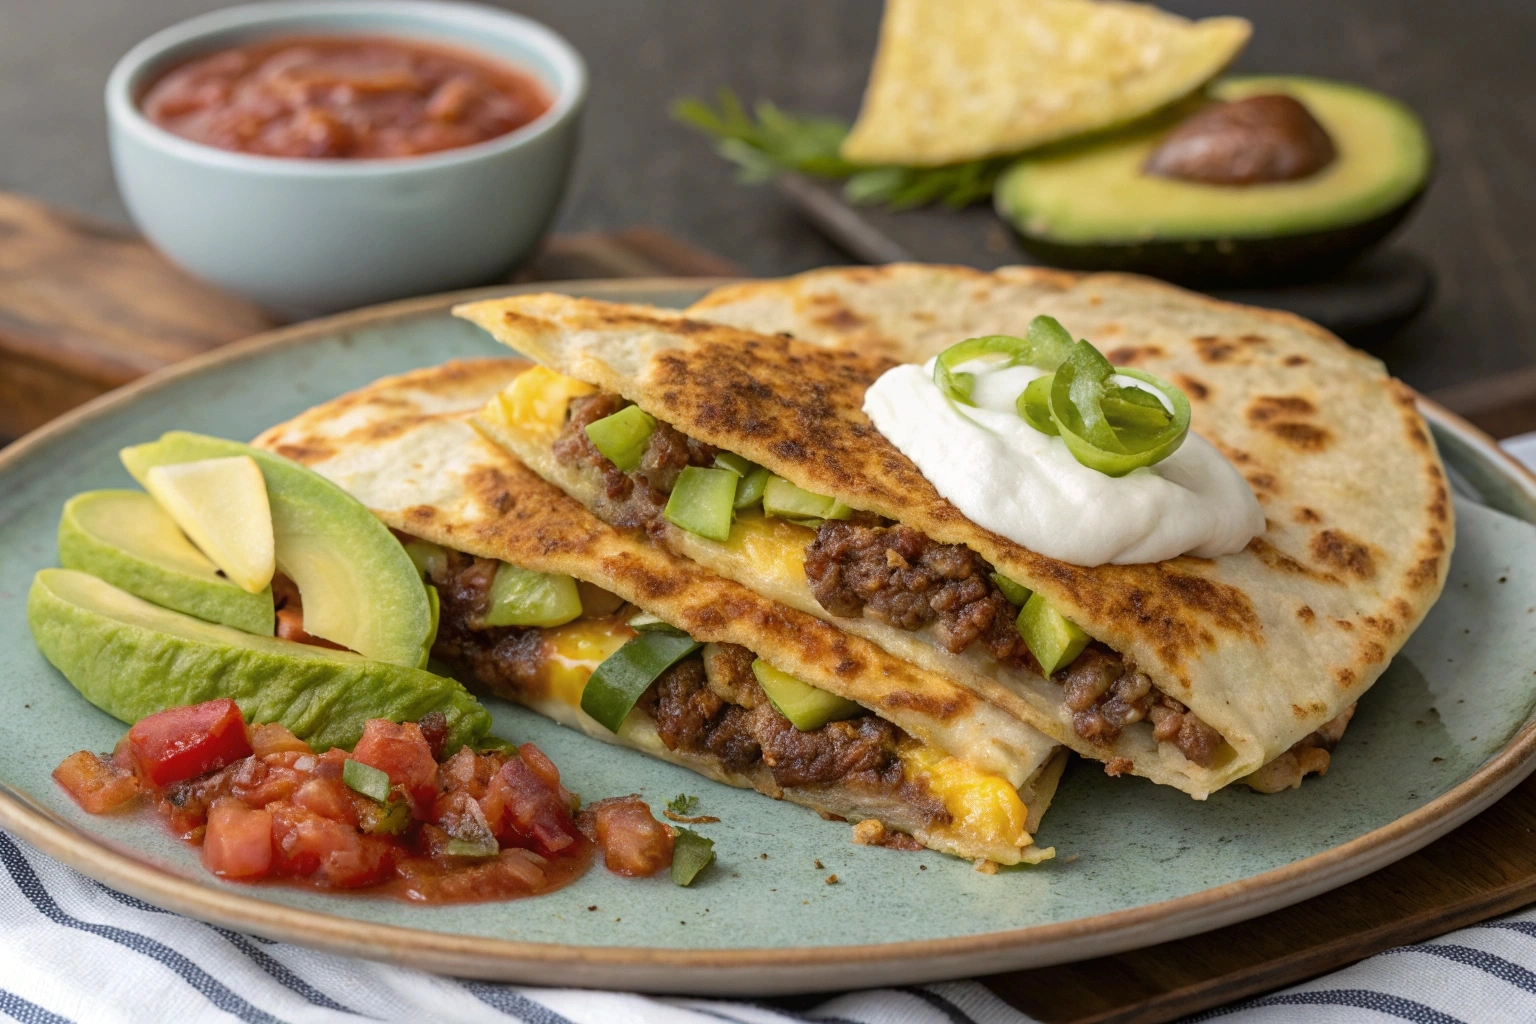
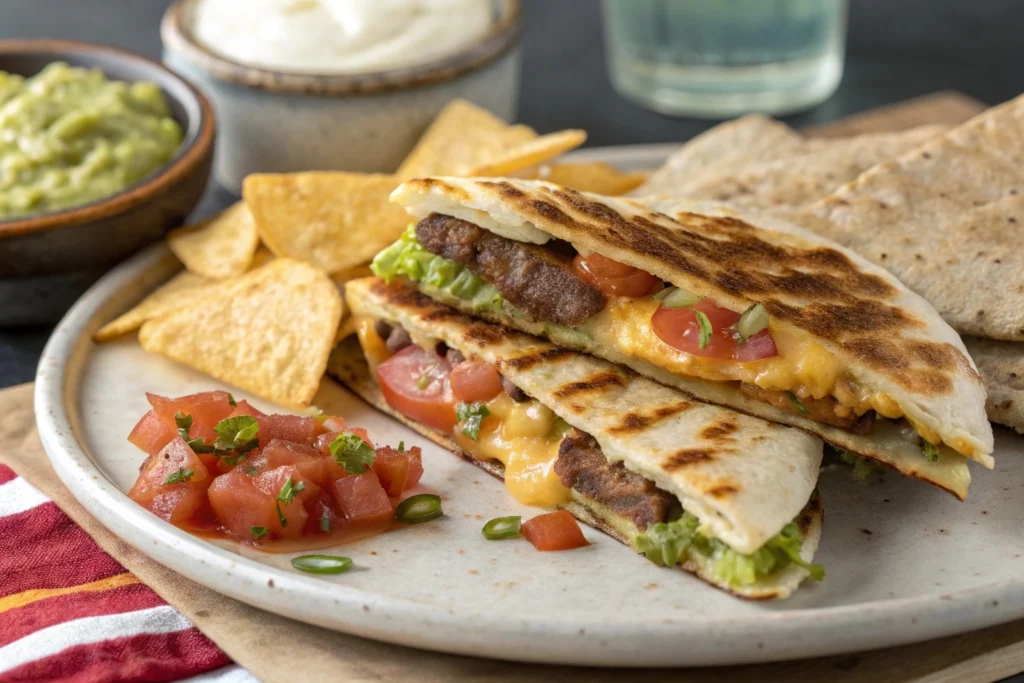
This Burger Quesadilla is a fun twist on two classic comfort foods. It’s quick to make (just 30 minutes!), easy enough for beginners, and packed with bold flavors that satisfy every craving.
It combines the juicy richness of a burger patty with the gooey, melty goodness of a quesadilla—all wrapped in a warm tortilla. The best part? With our 5 secret tips, you’ll be able to take this dish from “just okay” to “restaurant-quality” in no time.
Ready to level up your cooking game? Let’s get started!
🍔 Essential Ingredients for the Perfect Burger Quesadilla
Here’s what you’ll need:
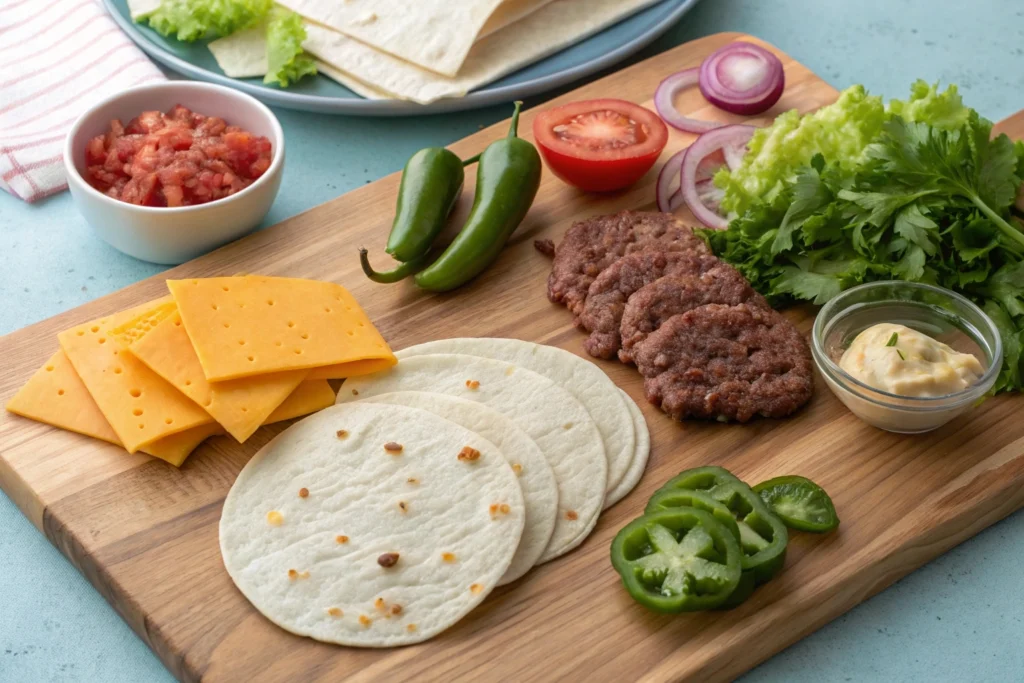
- Ground beef (or plant-based alternative) – the heart of the burger.
- Tortillas (flour or whole wheat) – choose sturdy ones that won’t tear.
- Cheese (cheddar, Monterey Jack, or pepper jack) – melts perfectly and adds creaminess .
- Onion and garlic – for that extra savory kick.
- Ketchup, mustard, or mayo-based sauce – adds moisture and flavor .
- Optional toppings: lettuce, tomato, avocado, jalapeños, sour cream.
Substitutions & Variations:
- Use ground turkey or a veggie patty for a lighter version.
- Swap regular cheese with vegan cheese or skip it altogether if you’re dairy-free.
- For extra crunch, add bacon bits or crushed tortilla chips inside.
🔪 Step-by-Step Instructions: How to Make the Ultimate Burger Quesadilla
Step 1: Cook the Burger Filling
- In a skillet over medium heat, cook 1 lb of ground beef until browned and cooked through.
- Add chopped onion and minced garlic; cook until softened.
- Season with salt, pepper, and optional spices like smoked paprika or chili powder for extra depth .
- Drain any excess fat and set aside.
Tip: For juicier results, don’t overcook the meat. A little pink in the center means more flavor!
Step 2: Assemble the Quesadilla Base
- Lay out a large flour tortilla.
- Sprinkle a generous amount of shredded cheese across half the tortilla.
- Spoon the cooked burger mixture over the cheese.
- Add a dollop of sauce (ketchup, mayo, or a homemade chipotle blend) for moisture and zing .
- Top with more cheese to help everything stick together.
Step 3: Cook the Burger Quesadilla
- Fold the tortilla in half.
- Heat a skillet or griddle over medium heat and lightly grease with oil or butter.
- Place the folded quesadilla in the pan and cook for 2–3 minutes per side until golden and crispy .
- Press down gently with a spatula to ensure even melting.
Pro Tip: Don’t rush the cooking! Low and slow helps the cheese melt without burning the tortilla.
🧑🍳 Assembly Tips: Building the Best Burger Quesadilla
- Layer smartly: Start with cheese on both sides to act as a glue and prevent sogginess.
- Use fresh tortillas: Stale ones crack easily and won’t hold up well.
- Press it right: A burger press or heavy pan can help flatten the quesadilla for an even sear .
- Serve hot: Fresh off the pan is always best, but if you have leftovers, reheat them in a skillet for crispiness.
📦 Storage and Make-Ahead Tips
If you want to meal prep:
- Make Ahead: Cook the burger filling and store it in an airtight container in the fridge for up to 3 days.
- Freeze: Wrap cooled burger patties individually and freeze for up to 2 months. Thaw overnight in the fridge before reheating.
- Store assembled quesadillas: Keep them in the fridge for up to 2 days. Reheat in a toaster oven or skillet (not microwave!) for best results.
Quick Tip: Tortillas can be warmed in the oven at 300°F (150°C) for 5 minutes before assembling.
🌶️ Recipe Variations: Make It Your Own!
Don’t be afraid to experiment! Here are some fun twists:
- Spicy Kick: Add diced jalapeños or a drizzle of hot sauce.
- Veggie Lover’s Version: Mix grilled mushrooms, bell peppers, and zucchini into the burger mix.
- BBQ Style: Stir in BBQ sauce into the meat and top with coleslaw.
- Breakfast Twist: Replace the burger with scrambled eggs and bacon bits.
- Gourmet Upgrade: Add avocado slices, balsamic glaze, or truffle mayo .
🧠 Frequently Asked Questions (FAQs)
Q: Is the Burger Quesadilla healthy?
A: Yes! It can be a balanced meal with protein from the beef, fiber from whole grain tortillas, and healthy fats from cheese and optional avocado . Choose lean meat and low-fat cheese for a lighter option.
Q: Can I make this ahead for lunch?
A: Absolutely! Prep the burger filling and store it separately. Assemble and cook just before eating for freshness.
Q: What’s the best cheese for melting?
A: Cheddar, Monterey Jack, and mozzarella all melt beautifully. Try a cheese blend for extra flavor .
Q: How do I keep it from getting soggy?
A: Don’t overload with wet ingredients. Cook the burger mixture thoroughly to remove excess moisture, and toast the tortilla slightly before assembling .
🎉 Final Thoughts: Time to Get Cooking!
The Burger Quesadilla isn’t just a fun mashup—it’s a delicious, customizable dish that brings together the best of two worlds. Whether you’re cooking for yourself, your family, or guests, it’s a crowd-pleaser that’s easy to whip up and hard to resist.
Now that you’ve got the 5 secrets to success, it’s time to put them into practice. Don’t be afraid to play around with flavors, textures, and toppings. After all, the best recipes are the ones that reflect your personal taste.
So grab your skillet, fire up the stove, and enjoy every cheesy, meaty, crispy bite of your brand-new favorite dish!
And remember…
Learn. Try. Enjoy.
Your journey to the perfect Burger Quesadilla starts now!